Healthy Never-Fail Tuna/Chicken Salad


When I was younger, I despised any form of chicken or tuna salad. I didn’t like tuna, for one, but mayonnaise disgusted me. That part hasn’t changed (sorry mayo), but let me tell you what has…


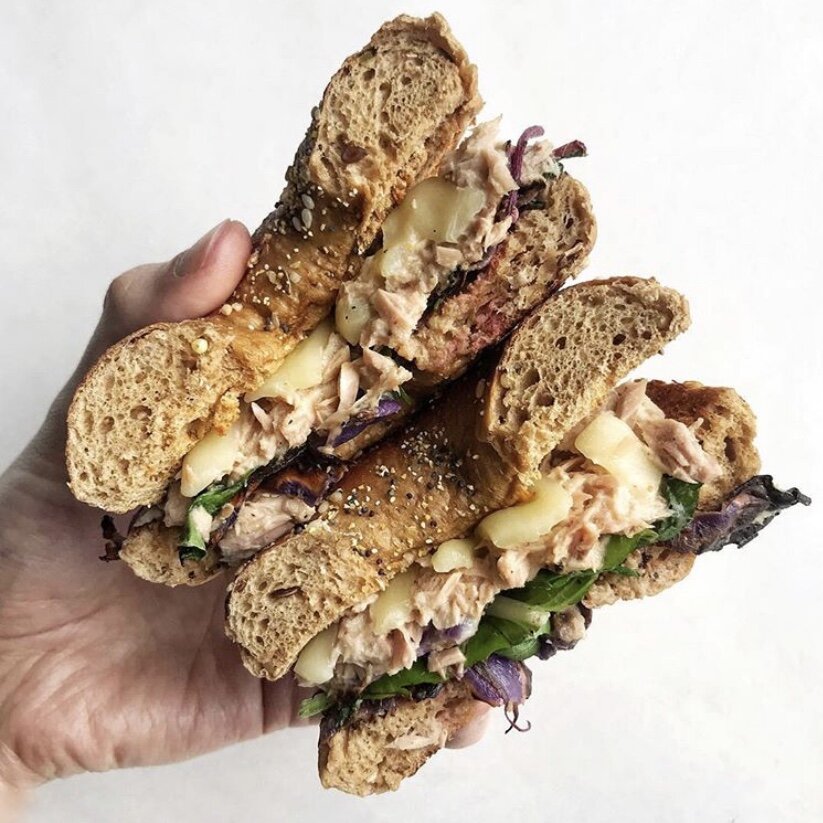
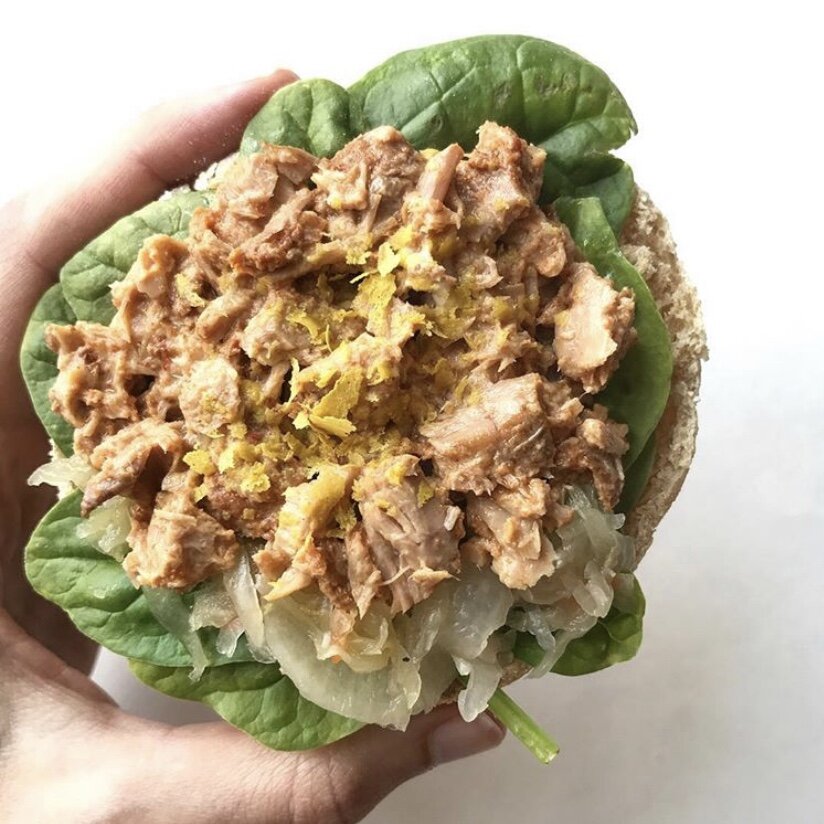
I now eat tuna and/or chicken salad at least once a week. I have been for a couple years, and I’ve been using the same recipe since way early on. It’s simple, quick, healthy, and DANG good.

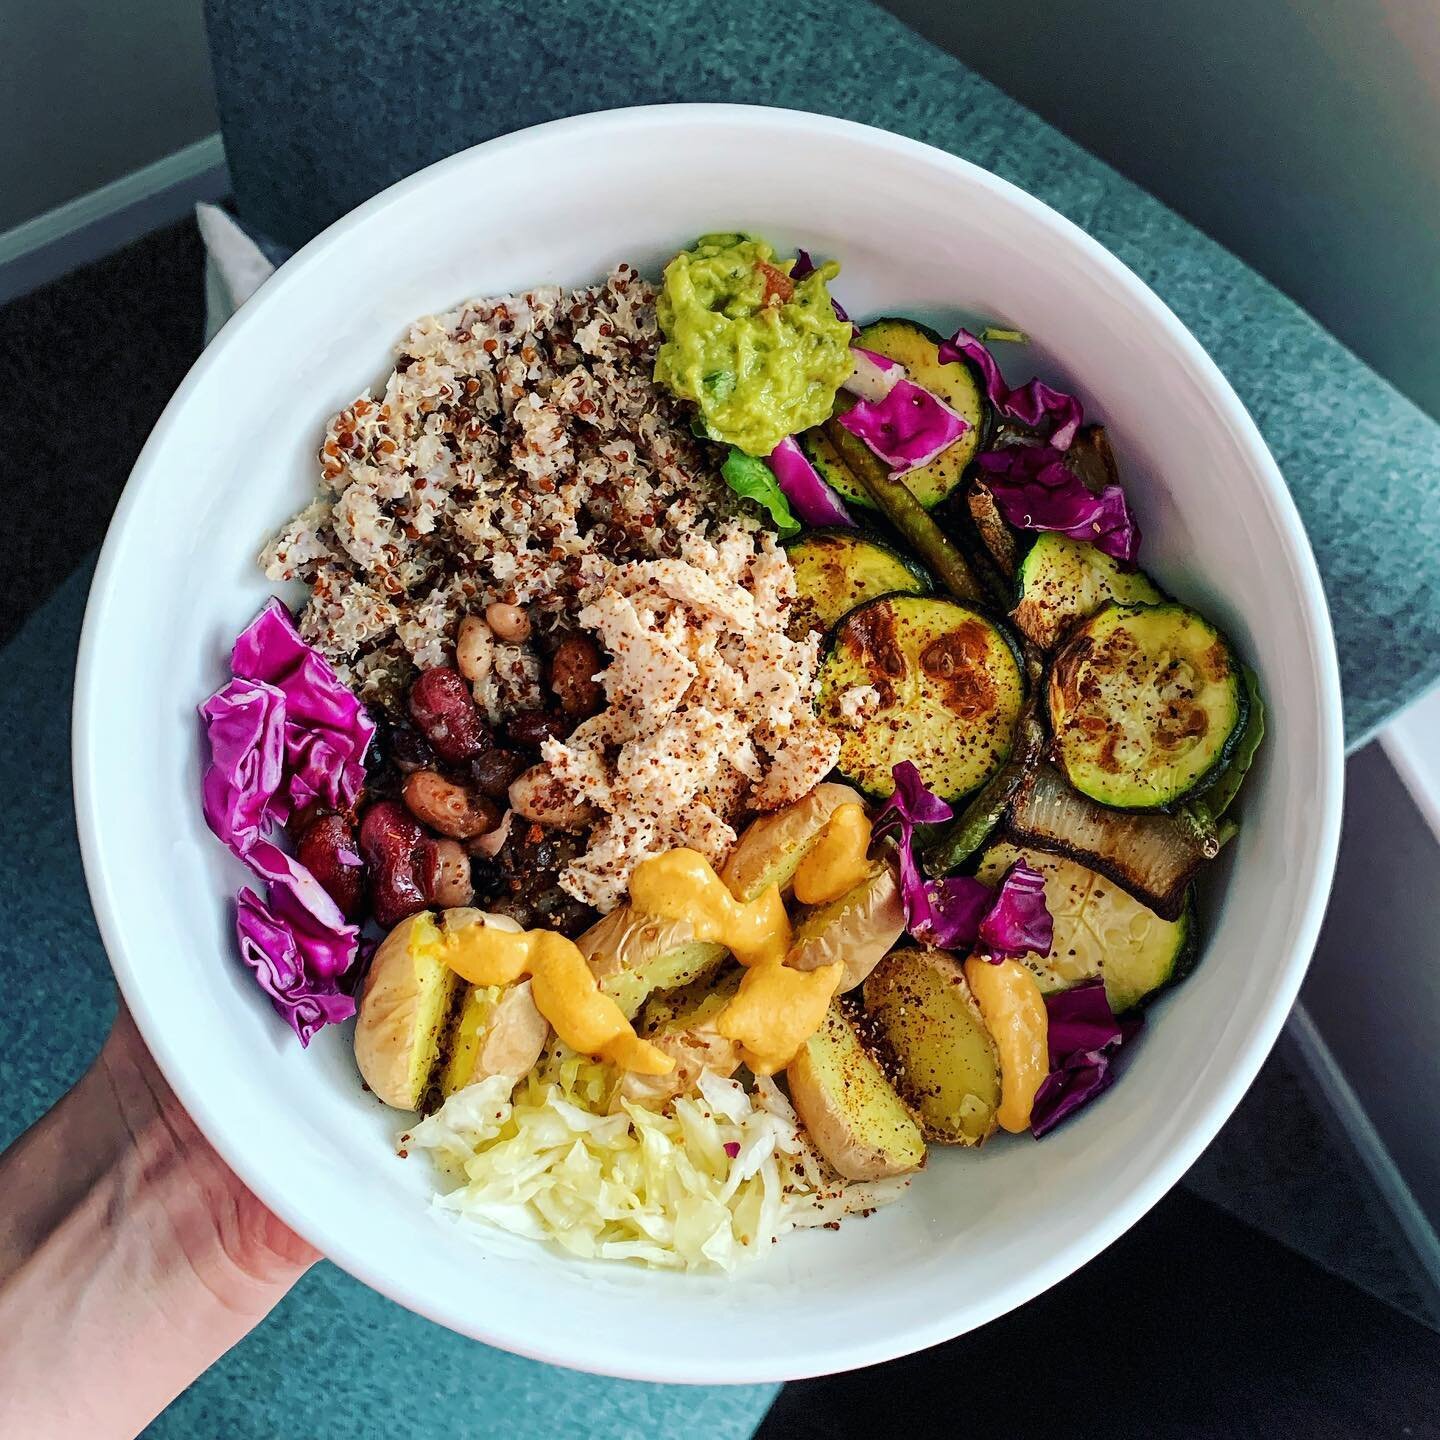
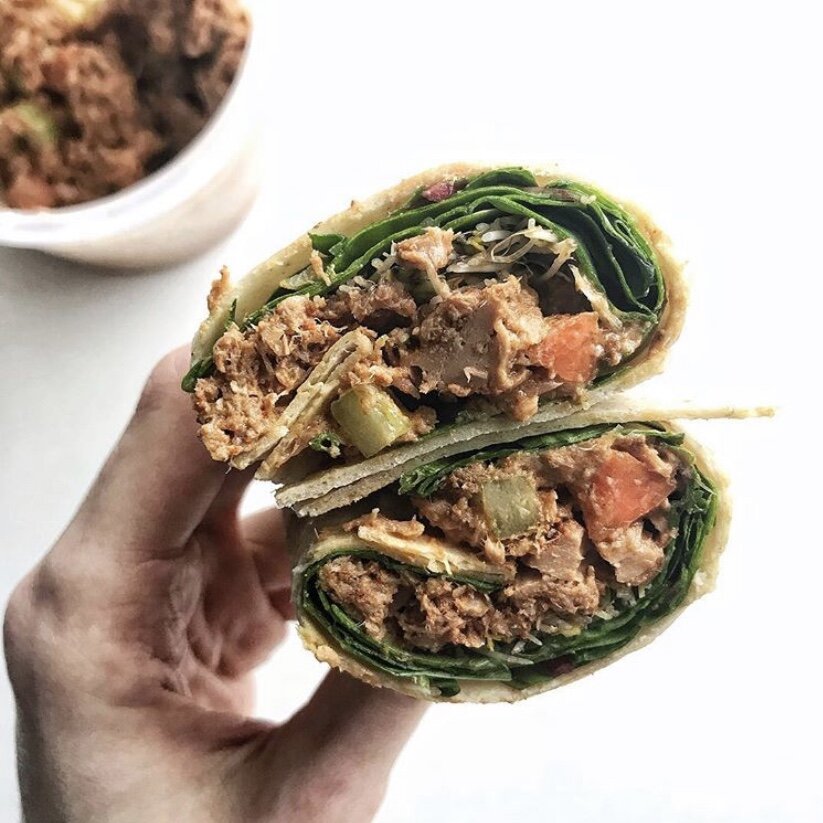
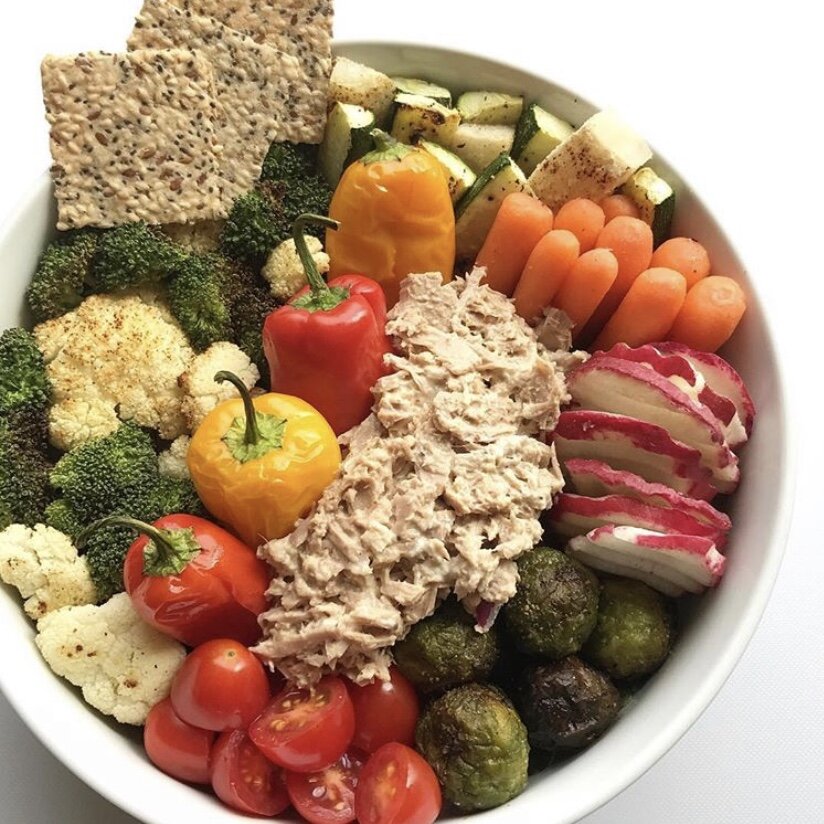
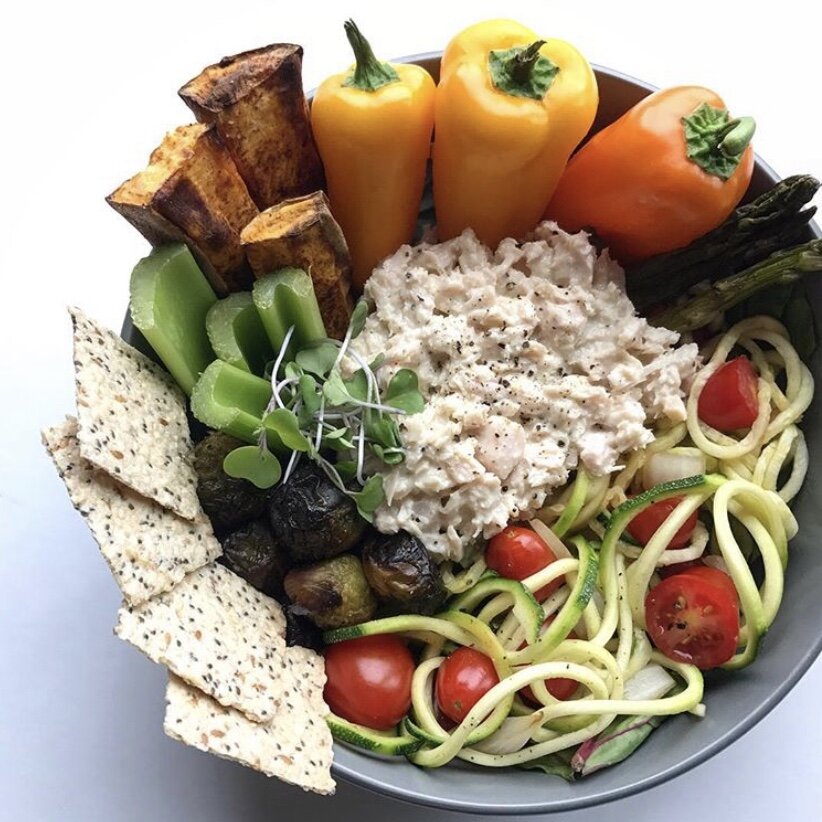
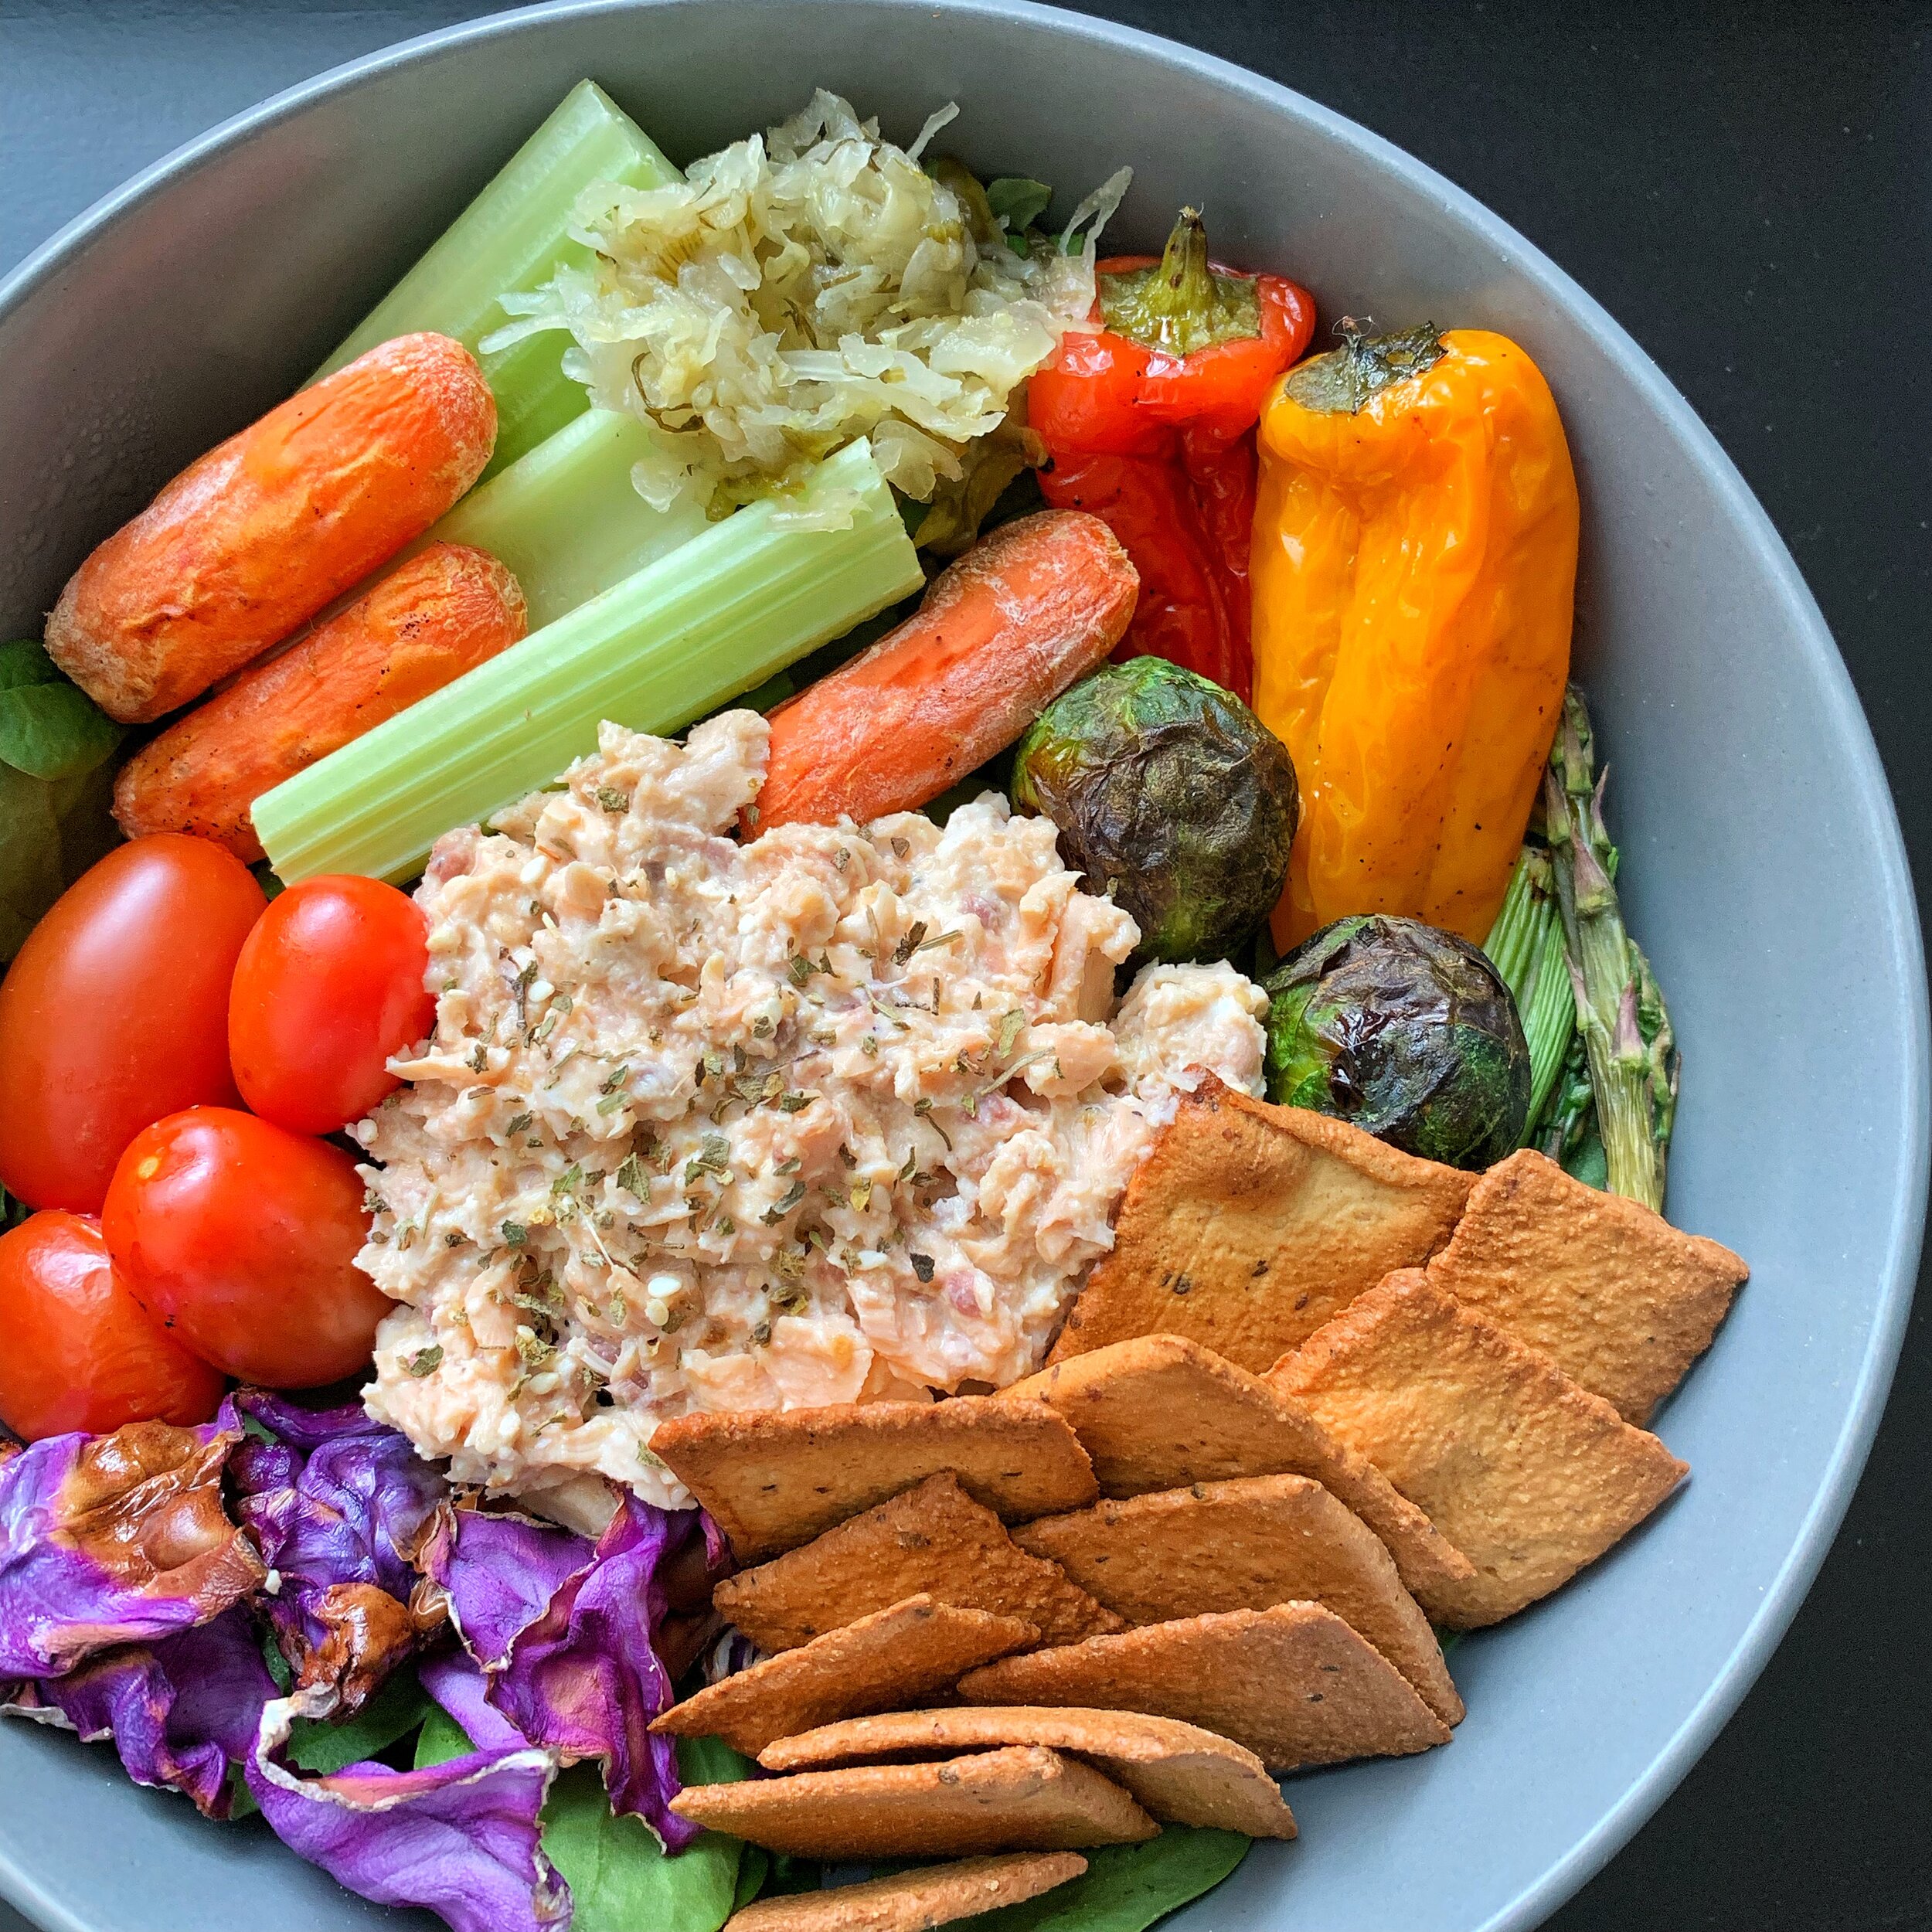
It’s also versatile, because I use this recipe with both canned tuna and chicken, as well as canned salmon! I love eating it with crackers, on a sandwich, or building a fancy bowl or salad around it.


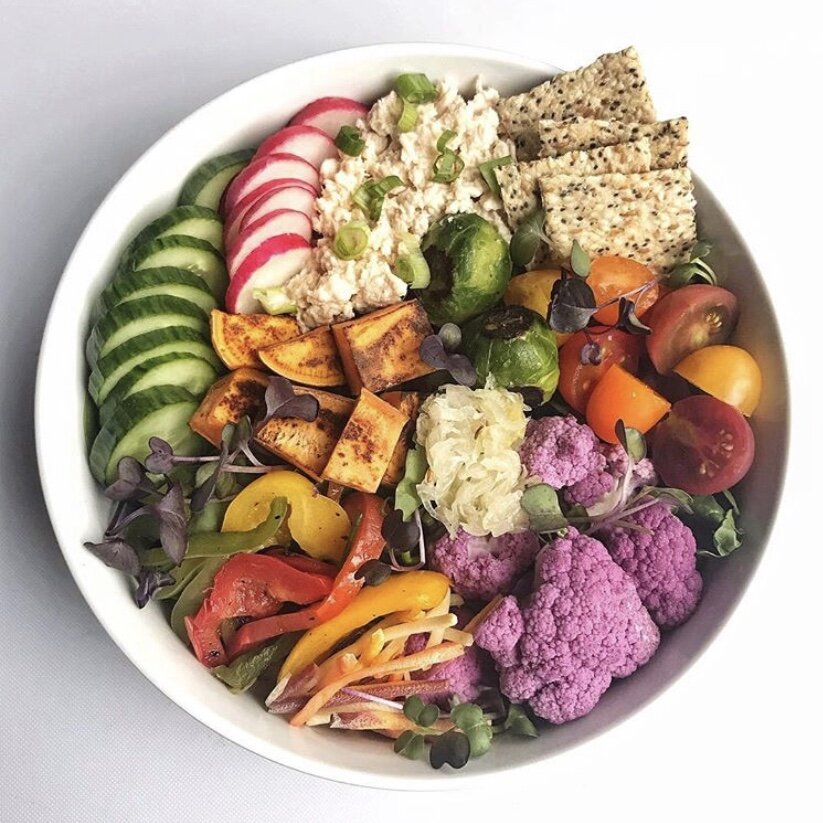
If you are a mayo fan, have at it! Feel free to use mayonnaise or a vegan alternative in place of the yogurt. It’s just not my thing 😝


IMG_2118.jpg

what you’ll need:

  • 1 can of chicken, tuna, or salmon (I ALWAYS use Wild Planet Foods)

    • If using a “no salt added” variety, you may need to add salt to taste

  • 2-3 TB plain Greek yogurt

  • 1/2-1 TB mustard (yellow, honey, spicy, dijon, etc.)

  • garlic powder

  • zesty lemon pepper seasoning

Mix everything together and you’re done! If not eating right away, store in an airtight container in the fridge.


Pumpkin Cookie Dough Hummus

I don’t know about you, but every time fall rolls around, I’m making a recipe like this at least once a week! It’s great any time of the year, but fall means ALL things pumpkin… right?


This recipe makes a “hummus” texture, but see the recipe below to turn it into pumpkin chickpea cookie dough in one easy step!

In hummus form, spreading it on a mini Western Bagel pumpkin bagel is DREAMY. Use discount code KYLA if you want to check them out!


IMG_5326.JPG

What you’ll need:

  • 1 can chickpeas, rinsed & drained

  • 1 cup pumpkin purée

  • 1/4 cup nut butter

  • 3 TB maple syrup

  • 1/4 cup nut milk

  • splash of vanilla extract

  • generous sprinkling of cinnamon

  • dash of pumpkin pie spice & sea salt

  • optional: 1 scoop collagen peptides**

For a thicker consistency like chickpea cookie dough:

  • add up to 1/2 cup of coconut flour and/or ground flax (pictured is the texture without these)


Directions:

  1. Blend everything in a high speed blender or food processor & adjust any liquid, sweetener, thickener, etc. as needed.

  2. Stir in chocolate chips or other mix-ins & enjoy! Store in the fridge for up to one week.

IMG_5409.JPG

**Adding collagen peptides will not change the flavor or texture at all. It completely dissolves and will only add protein.

I use Further Food collagen; discount code FINDINGBALANCE!

If you’re unsure of what collagen is or does, I wrote a whole blog post about it and the benefits of taking it. READ IT HERE!


Perfect Air Fried Corn-on-the-Cob

Snapseed 3.jpg

As if I needed another way to use my air fryer…

I don’t think I’ve ever actually bought corn-on-the-cob when shopping for my own groceries. It was only something I’d have at home when one of my parents made it. The process of cooking it was just too unappealing to me, and frozen corn seemed so much easier.

BUT, then I saw these corn on sale 8 for $1, and there’s no way this bargain hunter is going to pass up a deal like that. Now I’ve been buying corn every week!


I’ve been using all of my different Eat Clean Essentials seasonings to make different flavor combinations, and I have yet to find one that isn’t worth sharing! I’ll list a few of my favorites below, and they can all be used with this basic recipe. There’s SO many more possibilities though, so be sure to check out this spice collection and use code ‘KYLA15’ for a discount!

(P.S. I do not make money from this, it’s just for you to use!)


Combos:

  • Maple BBQ + maple syrup

  • Limon & Chile + lime juice

  • Lori’s No-Salt Seasoning + dijon mustard

  • Pizza is Life + garlic powder + Parmesan

  • Maple Doodle + maple syrup (a sweet combo!)

  • Grill Master + coconut aminos

  • Spicy Buffalo + plain greek yogurt + hot sauce

Snapseed 2.jpg

Directions:

  1. Remove husks from corn and break cobs in half, if desired.

  2. Place in air fryer basket and spray with oil.

  3. Season with salt, pepper, and any other spices you wish to use.

  4. Cook on 400 degrees F for 12-14 minutes.

  5. Add other flavoring ingredients (i.e. maple syrup, lime juice, yogurt, cheese, etc.), and enjoy!


DISCOUNT CODE: ‘KYLA15’


Frozen Chocolate Protein Bites

I make a lot of different protein balls (you can find some recipes here), but these guys are perfect for the warm weather that is finally making its way in!

They’re frozen treats that’ll keep you cool, but each one has almost 5 grams of super high quality plant protein, too! It’s a win-win :)

IMG_9998.jpg

Yield: 8 bites

Ingredients:

  • 2 scoops (1 serving) Nuzest protein powder

    • Chocolate, vanilla, or natural will work

  • 3 TB coconut flour

  • 2 TB ground flax

  • 2 TB nut butter

  • 2 TB agave or maple syrup

  • 1 TB cocoa/cacao powder

  • Dash of cinnamon

  • ~1/4-1/3 cup water or milk

  • Coconut shreds

Directions:

  1. Mix protein, flour, ground flax, nut butter, agave, cocoa powder, and cinnamon together in a bowl.

  2. Slowly add water until the dough is wet throughout and becomes a bit sticky.

  3. Separate evenly into an ice-cube tray, and sprinkle coconut shreds (or other topping) over each.

  4. Freeze for at least 1-hour. Enjoy!


discount code: KYLAK15


3-Ingredient Biscuits

FullSizeRender.jpg

These were a little kitchen experiment gone SUPER delicious. The first time I made them, I sat down and ate the whole batch right then and there… LOL!

Short disclaimer that there is nothing wrong with carbs… at all. Our diets should be over 50% carbohydrates, because they’re our main source of energy! However, if you’re getting carbs from other sources, there’s nothing wrong with enjoying a low-carb treat, like these :)


Yield: 4 medium-sized biscuits

WHAT YOU’LL NEED:

  • 2 cups riced cauliflower

  • 1 large egg

  • 1/4 cup coconut flour

  • Seasoning of choice

directions:

  1. Preheat oven to 400 degrees F.

  2. Squeeze all liquid out of the cauliflower rice using a paper towel or cloth.

  3. Beat the egg into the cauliflower until it is coated and sticky, and then mix in the flour. Season as desired. (I used salt, pepper, garlic powder, and herb seasoning)

  4. Scoop the batter into 4 balls and form into “patties” about 1/4-1/2 inch thick. Place on a baking sheet lined with parchment paper, and sprinkle additional seasoning on top, if desired.

  5. Bake for 20-25 minutes, or until golden and cooked through. Enjoy!